Pages

Tuesday, November 29, 2011

{ I have an obsession }

It's not pretty.

That statement is 110% totally and completely false.

My obsession is in fact VERY pretty... that's half the problem.

It's a sweet obsession too, unlike my Ziploc Addiction.

(I have many obsessions and addictions. That can't be good.)

Ok, here goes.
*deep breath*

It's....

SPRINKLES.

Yes, I said it. I just put it all right out there on the table.

My name is Tina and I'm a Sprinkle Addict.


I know what you are thinking...

Actually, no, I have no idea what you are thinking. Please help.

Is this amount of sprinkles normal??

Should I break out in cold sweats when I see new sprinkles in the store?

Huh? HUH?????????

Pretty, colorful, tasty, tasty sprinkles! 

You can't even see them all. I counted... *gulp* 38.

That's totally in the normal range, right? RIGHT??????

Lookit these. Aren't they beautyyyyyyyyyyyyyyful?


I am lucky enough to live within an hours drive of 3 different Amish stores. They have bulk stores, and they sell sprinkles GALORE. The average price I paid for these above is 70 cents. YES, 70 CENTS. The Silver Dragees were $2.61, because, well, they are Silver Dragees.

I know you can't gauge size from this picture, but these range from 1/4 to 1/3 of a pound, and did I mention the 70 CENTS??

'kay, just checkin'.

I'm noticing a distinct lack of green. I shall have to correct that soon.

Moral of this story is, if you live close to an Amish store, be sure to check it out for sprinkles! 

Pretty, pretty, sprinkles.......

Ok, woo. I feel better now, having gotten that off my chest. 

This sprinkle burden is much to carry.

Tina

Wednesday, November 23, 2011

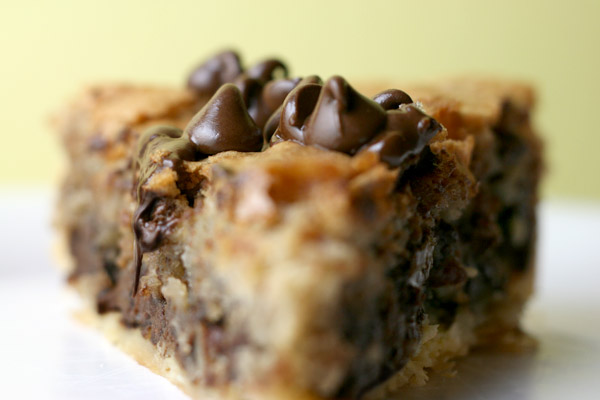
{ So, I'm making this }

and I felt you all needed to know.

I won't EAT it, because, much like the sister-in-law I'm making it for, it is quite nutty.

But doesn't it LOOK delish?
Last year, I made her a brownie pie. This year a cookie pie.

You are right, she really should totally love me.

And buy me shiny presents.

And tell me I'm pretty.

I will have to let her know you all said so.

This photo is property of Bakerella.com


Follow THIS LINK for the skinny.

Ha... skinny.


Tina

Sunday, November 20, 2011

{ Obligatory Thanksgiving Post }

TG2
Thanksgiving is in 4 days here in the States!

Woo!

I love Thanksgiving. Not just for the food, but the warm and thankful feeling of it all.
Not to mention that it totally ushers in the panic that is Christmas.
Which, I totally love. Panic and all.
Panic has totally started to set in already. I’m not loving it… yet. Simply because I’ve accomplished next to nil so far.
Go me!
*
I won’t be posting and step by steps for you today, simply because I don’t have the photos to go along with.
However, this will be quite the recipe laden post.
And who can’t love that.
*
Let’s start with our veg.
I love vegetables, totally and fully love vegetables.
Except Peas and Carrots. You know, Green Bean’s ugly step sisters? Yeah.
There are actually carrots in this recipe though. Ya know why?
Because they don’t taste like carrots when you are finished! 
Take that, Oh Orange Ones!

Now, the fact that these are covered in processed cheese and butter might have a *wee* to do with it.
I only make this at Christmas and Thanksgiving. It’s so one of my favorite things though.

Easy. Peasy. Lemon. Squeezy.

TG3

MIXED VEGETABLE AND CHEESE CASSEROLE
 
1 (20 oz.) bag frozen vegetable medley (broccoli, carrots, onion, etc.)
1 (20 oz.) bag frozen cauliflower
8 oz. pasteurized process cheese (Velveeta) cubed
1/2 c. butter, melted

1 cylindrical package of round buttery crackers (such as Ritz or Town House), crushed
Cook frozen vegetables, according to package directions, just until tender-crisp. Drain and spread evenly in buttered casserole. Top with cheese cubes, stir together melted butter and cracker crumbs and sprinkle over cheese. Bake, uncovered, in 350 degree oven or until bubbly. (Serves 12.)
 
Source Cooks.com (and my friend Lori who told me about it)
 
*
Next comes a recipe for Corn. Corn Casserole, Corn Pudding, whatever you wanna call it, I call it good.
 
And obviously, I cannot leave veggies in their birth form on holidays.
 
My mom makes killer green beans for holidays too, beans from the garden that my dad has grown and canned, cooked with mushrooms, onions, and water chestnuts.
 
You should be jelly of them, they are… wonderful.
 
Ok, so corn.
 
My Aunt Diana has, for years, make this recipe. SUPER easy. It really IS good.. but….
I found this recipe online last year though, and I think I like it a little better. Sorry Aunt Diana!

Here’s her recipe if you want to give it a try:

AUNT DIANA’S SCALLOPED CORN
1 can corn
1 can cream style corn
1 egg, beaten
1/2 to 1 sleeve Ritz/Town House Crackers, crushed
Butter oven proof dish. Pour corn into dish, add beaten egg, and crackers to mix, stir well. Reserving crackers to sprinkle on top. Dot with butter. Bake @ 350 for 40-50 minutes.
*
Now, for Mac & Cheese, I will point you in the general direction of Pioneer Woman.
Last time I made it, I added finely diced onion, bacon, and sour cream to it.

Yeah I did!
*
My mom makes the dressing, I never have. Last year I made this “oyster dressing” that my grandmother used to make and she dearly loves, but, sorry mom- gross.

Last year I made yeast rolls. Uhh…this year, I’m doing frozen dough Winking smile
*
Now, let’s talk desserts.

Here is the Bean’s fav

He eats it sans crust as a pudding. Really, I can’t blame him, I myself, do not eat crust.

Yes, I just heard you all gasp out there in the interwebs.

Last year I made these pies for the hubster:


Recipe is here. This year he is back to normal and wants his peach pie.

I love my mom’s pumpkin pie. I think other pies less wonderful.

But everyone probably feels that way about their pie!

Here is my mom’s recipe though. It’s an odd amount, and doesn’t quite fill 2 pie shells. It MAY fill two 9” shells, however. Her’s are all 10” deep dish.

My Mom’s Pumpkin Pie
1 1/2 cup Pumpkin (canned)
1 Cup sugar
1/2 cup milk
1/2 cup evaporated milk
1/4 teaspoon salt
1/4 teaspoon ground cinnamon
1/4 teaspoon ground nutmeg
1/4 teaspoon ground cloves
2 eggs, slightly beaten
1 Tablespoon butter

Mix together. Pour into pie shell. Bake @ 425 until toothpick comes out clean (35-50 mins).

TG1

Oh, and yes, the first pictures DOES have a Pecan Pie in it.
Here’s the recipe for that.
*
Leftovers you say?

Well… some of othe leftover turkey usually ends up here:
Turkey and Noodles, ummmhmmm.

Here’s that recipe.
*
Now, for the placecards, this year I will be doing these

or these

Probably the pumpkins. Learn how to make both in this post.
*
To finish off the evening, I will be settling down with a nice warm drink.

Maybe this

or
this

*
I do start the day off with a super easy and delicious cheeseball.
I hope to get that posted before Thursday.


If I don’t, I want to take the time to say, thanks so much for joining me here at Sugar Bean Bakers.
I hope that you have a most wonderful and blessed Thanksgiving!
Tina


Shared at:


Everyday Mom's Meals

Saturday, November 12, 2011

{ Cookie Mixes... and other stuff too}

I posted this last year, but since the Christmas Season is upon us, I thought I'd throw it out there again.

Also works for bread mixes, pancake mixes* (which can make Christmas breakfast smoother), cake mixes, etc!

Good stuff.

Give 'er a try sometime.


Tina

*That's for you, Margie ;)

Shared at:


Everyday Mom's Meals

Monday, November 7, 2011

{Oreo Inside Cupcakes}


What?

It’s not the devil inside… but almost.

Devilishly good though.

Yeah, there’s Oreos inside these cupcakes.

Not like these either.

WHOLE. OREOS. INSIDE.

I kid you not.

Topped with Cookies & Cream Buttercream.

Doesn’t that just roll off your tongue?

Of course, you’ll want it ON your tongue…not rolling off.
O_1
Wanna make some?

Well, you’ll need- I know this is shocking.. but you’ll need…

OREOS.
24 for the Cupcakes & 10 or so for the frosting.

If you want more in your frosting…

Hey, who am I to argue?

  Prep your pans with liners.

Then plop in Oreos

O2

Then… cover with cake batter.

I used French Vanilla.

You could use white, yellow, or… if you are really devilish, chocolate.

Test at 18 minutes. Should take around 20. (consult box)

Once they are done, you won’t even be able to tell that they are withholding information.

Delicious information.

Make your buttercream.

2 sticks butter or margarine softened   
 1 teaspoon vanilla (clear if you’ve got it to keep it whiter)
4 cups powdered sugar (approximately 1 lb.)
2 tablespoons milk
    Then take the extra Oreos and smush them.
    o4
I used my Ninja. You can use a food processor.

Or if you have pent up aggression, you can beat the lil guys to smithereens yourself.

With a rolling pin.

Or a hammer.

Whatevs.

When appropriately smushed, 

o6

mix into your Buttercream.

o7

Then, top your cakes with this yumminess.

If you can keep your fingers out of it long enough.

o3

All that is left to do then is…..
BITE!

Why, HELLO, Oreo!

I love to see people’s expressions when they peel the wrapper off.

What IS that?

IS THAT AN OREO??

Good times, I tell ya, good times.

Tina


*note, since the Oreos take up so much space in the liners, I actually had enough batter left over to make 12 babycakes (aka mini cupcakes), so you may have enough batter to make 3 or 4 more oreo cakes. I was just out of  regular muffin pans.

Friday, November 4, 2011

{ Edible Thanksgiving Place Cards }

What's the best thing about Thanksgiving?

Yeah, eating.

You know it. 

What? 

Oh, sorry, being Thankful. 

My bad. 

Eating runs a close second! 

So, these place cards? Totally edible. 

That's good stuff, right? 

Right. 

What you will need to make these projects are:  

Pumpkins
Marshmallows 
Green Tic Tacs 
Sunflower Seed (hulled) or Pretzel Sticks 
White Melting Chocolate 
Lollipop Sticks 
Orange Sanding Sugar 
Orange Candy Color (optional)  

Turkeys
Marshmallows 
Melting Chocolate 
Striped Shortbread Cookies 
Candy Corn or Indian Corn 
Icing Writers or Small Sprinkles 
Tootsie Rolls (optional) 
Assorted Sprinkles or Icing Writers
Round Candies (I used Whoppers) 

For the Pumpkins, we start by melting the chocolate, then adding the candy coloring. You must use special candy coloring for chocolate, regular food coloring will not work. You can also leave the chocolate white or use orange candy melts. I never have great luck with the melts, so I tend to stick with Almond Bark.

Dip a lollipop stick (we totally call these 'suckers' instead of lollipops here. Anywhere else have suckers?) in a little chocolate, then into your mallow. Allow to dry.


After completely dry, dip the entire marshmallow in the chocolate. Lightly tap the hand holding the stick with your other hand, this will get the excess chocolate to drip off.

Next, over a bowl, to catch, totally coat your marshmallow with orange sanding sugar. You can leave the bottom without, if you like, I did that with some of mine, but I prefer the fully coated mallows.


Yes, I totally got chocolate down this stick. Try not to be like me.

I use a block of inexpensive foam, that you can purchase at any discount or craft store, to stick pop projects in. Very useful.

I wrap it up after, and save for next time.

Next, we are going to add a stem and a leaf.
The stems I used were Sunflower Kernels, but a pretzel stick would be great as well, possibly better.

For the leaf, I used a green Tic Tac, I feel some of the gummy candies would work great also, or a cut and squished gum drop. Be creative, it's up to you!

Dip your stem in a little chocolate, then poke in the top.

Do the same for your leaf, but you may have to hold it there for a minute. Shouldn't take too long to initially set.

Then.. just let dry!

For Mr. Turkey, we start also, with a dipped mallow. This one stickless, and in chocolate chocolate, not white. Unless Albino Turkeys are your thing. Then... feel free.

Allow the mallows to dry, then use some chocolate to adhere the chocolate side of the shortbread cookie to the back of the mallow. It's easiest to work with our turkeys on their backs. 

They also enjoy the resting time.

Add the whopper for his head, and hold for a minute or so, until it sticks.
Add sprinkles or using icing writers to make his face. Here I used white nonpareils for his eyes (I added his pupil by dipping a toothpick in melted chocolate and dabbing it on), a mini yellow chocolate chip for his beak, and a heart sprinkle for his waddle. You can use a chocolate mini chip for his beak or cut off the white end of a candy corn for it as well.

Add a bit of chocolate to the cookie.

Here is a photo of my progress. If you want, you can totally pull off doing this neatly. I, obviously, cannot.


I won't judge you if you are neat though. 

Be jealous? Maybe. Judge? No.

Attach your candy corn to the chocolate you just applied.

After that, make little name tags, and attach to toothpicks, and.. you can be totally done.


Or.............

You can make him a funny little hat.

Feel how you want, but I think funny little hats are always in season!

All you need for these are toostie rolls, Just shape with your fingers until you've made a little brim & top part of the hat. Use the melted chocolate to attach together, then to his head. You can add a shaped sprinkle or a little icing writer for the final touch.

My guy has a flower, just because he's worth it.

These would be great to make in an assembly line fashion. Unfortunately, rare is the time that I have an assembly line formation. It's usually just me. All alone. In the kitchen. Doing all the work. 

*sigh*

Have you all seen the "Childhood is Calling" commercials? It's for a cereal. A cereal that you can make 'treats' out of- yeah, youknowhatimean... Anyway, those commercials always make me misty. The Bean and I used to bake in the kitchen together all the time. If Childhood is Calling, then Teenagehood is Texting, and it never seems to say "go hlp ur mom n the ktchn".

Darn technology.

Anyway... Turkeys in Hats!

Please ignore the tape fail on the nametag...


And.. some pumpkin goodness:


  hanging out at the edge of your glass

or laying in a bowl


or with the silverware


and hey, turkeys like silverware too!


Pumpkin tastes good. Turkey tastes good. As do these.

Just in a different way.

So you can have your place card, and eat it too!

Stay tuned for more Thanksgiving posts!

Tina


Visit thecsiproject.com

Wednesday, November 2, 2011

{It's my 1 Year Blogiversary!}

Happy Blogiversary to me!

My first post went live just over 1 year ago on 10/24/10.

I'm so happy that you have all been along for this ride with me. 

Thanks so much!

Hope you'll stick around.
So, what's your favorite thing I've posted in the last year?

I'd love to know!

Tina