Search Sugar Bean Bakers

Showing posts with label fall. Show all posts

Monday, November 7, 2016

{ Easy: Lasagna Soup }


I'm sure you've seen many recipes for Lasagna Soup, but I'm here to help. I've simplified those recipes with numerous ingredients and spices into something you can whip together quickly and easily on a busy weeknight.

Lasagna soup, if you don't already know, tastes almost exactly like lasagna, except in a rich, thick soup form. Is good.


You'll need pretty basic pantry ingredients: tomatoes, spaghetti sauce, chicken stock, etc. You won't need container after container of different spices, just salt, black pepper, garlic powder, and Italian seasoning.


This soup will come together quickly and easily. You can brown your burger in the soup pan, then add all the ingredients in, making this a one pot clean up.


This soup is great for these fall (and yet to come winter) dinners. It is a warm, delicious comfort food great for chilly nights.

Add a salad and some garlic bread and you have an easy, hearty meal

Soups on!


Lasagna Soup
By Tina @ Sugar Bean Bakers

1 pound ground beef
8 Cups chicken broth
1 Large Can (28oz) Crushed Tomato
1 Jar Spaghetti Sauce
10 Lasagna Noodles, broken into small pieces (or other pasta
1 Teaspoon Garlic Powder
1 Small onion, finely chopped
1 Teaspoon Salt
1/2 Teaspoon Black Pepper
2 Teaspoons Italian Seasoning
Ricotta, shredded parmesan & shredded mozzarella cheeses

In a large pan, brown burger for about 5 minutes. Add in chopped onion and cook for approx another 5 minutes until the meat is no longer pink and the onions are soft. When cooked, drain excess grease from meat.

To the pot add: chicken broth, crushed tomatoes, spaghetti sauce, and spices and cook at medium heat until boiling. Reduce heat and simmer for about 20 minutes.  Add pasta and allow to cook on low until al dente.

Ladle into bowls and top with ricotta, shredded parmesan & mozzarella cheeses.

Thursday, October 20, 2016

{ Caramel Iced Pumpkin Drop Cookies }


It's family tradition here, as I'm sure it is in many, many homes across the country, to watch "It's The Great Pumpkin, Charlie Brown".


Last year, even though Bean was 18 at the time, I started a new tradition for "A Charlie Brown Thanksgiving". I gathered up all the foods the kids ate for Thanksgiving and served it as we watched.
(You can read more about this & other Holiday Tradition ideas here.)

I wanted to do something fun for Great Pumpkin as well, so I decided to make some pumpkin cookies to munch on while we watched last night.


These cookies are an easy recipe. They are a no fuss drop cookie. They bake up light, fluffy, and cakey, and sport a caramel icing. What could be better?


Lightly pumpkiny, lightly spicy, all yummy.


Great for any fall festivity or any day of the year.


Enjoy!


Pumpkin Drop Cookies
by Tina @ Sugar Bean Bakers
Makes approx 24 cookies

Pumpkin Cookies:
1/2 cup (1 stick) butter
1/4 cup white sugar
1/4 cup firmly packed brown sugar
1 egg`
1/2 cup canned pumpkin
1 teaspoon vanilla extract
1/2 teaspoon baking soda
1/2 teaspoon baking powder
1/4 teaspoon salt
1 teaspoon cinnamon
1 1/4 cups flour

Caramel Icing:
2 Tablespoons butter
1/4 cup packed brown sugar
3 Tablespoons milk
splash of vanilla
1 cup powdered sugar (sifted is best to break up any clumps)

For the cookies:
Preheat oven to 350. Line baking sheet with parchment or leave ungreased.

In a large bowl, mix together flour, cinnamon, salt, baking soda, and baking powder. Sit aside. In a large mixing bowl, cream butter and sugars together with mixer until they are light and fluffy. Blend in egg. Then add pumpkin and vanilla. Slowly add flour mixture to sugar mixture. When well blended, drop cookies by tablespoons full 2" apart onto baking sheet.

Bake 9-11 minutes until edges are golden. They will be puffy and light.

Allow to cool on wire racks before icing.

For icing:
Melt butter, then add in brown sugar. Stirring constantly, bring mixture to a boil. Allow to boil one minute, remove from heat, and add in milk. Whisk in powdered sugar until glossy with no lumps.

Working quickly, dip cookies into warm icing, or spread on using a pastry brush. This icing will harden quite fast. Either leave on lowest setting while working, or return to stove if it hardens and allow it to warm to a spreadable consistency again.


Recipe adapted from Food.com 

Sunday, October 2, 2016

{ Easy Halloween Planter Craft }


Oh. My. Goodness! It is October! My favorite, favorite, favorite month of the year! I LOVE Autumn. Fall is everything that is good and wonderful rolled up into one season. I mean, if we want to be technical about it, even nearly all of the Christmas season is in Fall!

In the wise words of Anne of Green Gables:


Now, honestly, I am not much of a Halloween decorator. I AM a Fall decorator though. I love things that will work from late September through Thanksgiving (I'll get to that at the end of this post). I have had the idea to make this planter for quite a few months now, and so, here it is.

This is everything you'll need:

2 Jack o Lantern Trick or Treat buckets
1 can of plastic adhering spray paint- your choice of color
dry sand or gravel
Mum or other fall flower


Remove the handle from the buckets and throw away. This is optional, You can leave the handles if you like them.

Paint buckets and allow to fully dry (a few hours) before proceeding.


Fill the bottom bucket with gravel or sand. This will keep your buckets sturdy, otherwise, once you add your flower, it will become top heavy.


Hot glue around the bottom rim of your top bucket (no photos, sorry, hot glue is hot). Stack buckets together. Glue around the outer rim once you have them together. Spray paint over exposed glue, or you can put a ribbon over this part if the exposed glue line bothers you.

Plant your flower!

*You CAN drill holes in the bottom of each bucket to allow for draining, but I didn't I just plan not to over water ;)

That's it, folks!


This is about a $15 project max  ($1/each for pumpkins, gravel/rocks or $2-$3 for play sand, $6 for spray paint, & about $5 for a mum).

Now, for the late Sept-Thanksgiving decoration that I mentioned, just turn this around and place the faces toward a wall and you'll have something you can use for months!


Happy Crafting!

Tina


linked up at:
Rae Gun Ramblings
Skip to my Lou
Mad in Crafts
I Should Be Mopping

Saturday, October 3, 2015

{ Apple Flautas }


In High School, I had a weird, wacky, and wonderful Spanish teacher. Let's be honest here, aren't nearly ALL the langugage teachers weird and wacky? Our favorite thing she did was yelling "Ducles!" as she threw candies around the classroom.

My Spanish teacher was also my Odyssey of the Mind coach. Yeah, I was that kid. We'd often get together at her house to go over plans for our competiton. She would serve us up snacks and we pondered how to create machines, write our skit, go over music choices, etc.

One of the snacks she often had was Apple Flautas. I'd never had one before and I was instantly smitten. Her's were frozen and I've searched for them on and off over the years, but have never found them.

She'd bring them out and declare, "Flautas!", as she mimicked playing the flute so we'd know exactly what 'flauta' meant.


I finally decided to make them. They are really easy, so I'm not sure what took me so long.

You need minimual ingreidents, probably things you already have in house, and minimual time and effort. Let's be honest here, those are our favorite recipes, amiright?


You can garnish them with a little powdered sugar, caramel sauce, whipped topping, and sprinkles too!

They are also amazzzzing with vanilla ice cream.

So this one goes out to you, Senora Morton, where ever you are! Dulces! Dulces para todos!


Tina


Apple Flautas
by Tina @ Sugar Bean Bakers

12 flour tortillas (8"- taco sized)
1 -21 oz can apple pie filling
1/4 cup butter, melted
1/4 cup white sugar
1 teaspoon ground cinnamon

For garnish:
whipped topping
powdered sugar
sprinkles
caramel sauce
-or-
serve with vanilla ice cream

Preheat oven to 350 F, line rimmed pan with parchment paper, set aside.

Dice up the apples in the filling.

In a small bowl, mix together cinnamon and sugar.

Brush the outside of tortilla with melted butter and sprinkle with cinnamon mixture. Lay on prepared sheet and do the same to the inside. Repeat for remaining shells. Spoon filling in tortillas, roll up. Lay seam side down on baking sheet. Brush with a bit more butter and sprinkle again with cinnamon sugar.

Bake for 15-20 minutes until the apple filling is bubbly (A small amount may ooze out while baking, this is to be expected). Allow to cool slightly, serve warm.


Wednesday, October 29, 2014

{ Mummy Munch Party Mix }


Hey, hey, hey, here's my Mummy Bones & Mini Mummy Cookies in action. Cute, no?

But, before we get to that, let me tell you a little story.

Last week, I awoke to a delicious smelling breakfast. It was all mapley and wonderful smelling. I thought, aw, my sweet Bean has gotten up and fixed breakfast! What an awesome guy! What a total champ! I drag myself out of bed and to the kitchen to find... I'm the only one awake. Whut?

Hubs was at work that weekend, but I knew it was definitely not anything lingering because the man eats Cheerios every day. Huh. Maybe I was dreaming in Smellovision.

The next day, I awoke to the same smell. This time, totally convinced nothing was going down in my kitchen, I was starting to worry for my Old Factory sense along with, hello, my brain.

The third day it happened, I was really becoming concerned. Should I consult WedMD for 'awaking to delicious smells'?  Probably not. That never ends well.

On the fourth day, I noticed something. A basket I'd recently placed not far from my side of the bed. A basket I'd removed from my closet for fear it would smell up Bean's tuxedo which was hanging just above where said basket used to sit.

A basket... full of Scentsy wax melts.

Bad news? No specially made, delicious breakfast for me.

Good news? My nose and brain are in tact.

Better news?

I have an awesome Halloween Snack Mix for you.


I really like making party mixes. I have a few here on the blog.

They are so easy to make, always a big hit, and can be dressed up for any occasion. This party mix requires a bit more time than most, having the Mummy Bones, and Mini Mummy Cookies. They are definitely a fun addition, but if you are in a time crunch, the mix is still totally delish without them.


You'll just need a few basic ingredients and you are off.

Serve it at your Halloween party, bag it up and give as treats or party favors, or enjoy on your own while gathering around the TV and watching It's the Great Pumpkin, Charlie Brown!

For more Halloween goodness you HAVE to go check out Darla's Mocha Cookies and Cream Cupcakes with Skull Cameos. They are AH-MAZE-ZING. Gorgeousness. You won't be sorry, so click on over to Bakingdom!

Happy Halloween!

Tina


Mummy Munch Party Mix
by Tina @ Sugar Bean Bakers

3 Cups Frosted Cheerios
3 Cups Rice Chex
3 Cups Popped Popcorn
1 Cup Mini Marshmallows
1 Cup Fall colored M&Ms
Fall sprinkles
6 blocks White Chocolate Almond Bark (or other white chocolate), melted
A few Mummy Bones (I only used about 12 for this mix)
A few Mini Mummy Head Cookies (I only used about 12 for this mix)

Line counter with parchment paper. Spread out cereal and popcorn. Pour white chocolate over. Allow to slightly cool, then toss with hands. Scatter sprinkles and M&Ms before chocolate is fully dried. Add marshmallows just before serving. Lay Mummy Bones & Mummy Head Cookies on top of the mix after you've put it into a bowl for serving. If packaging it up for party favors, add 1 mummy bone and 1 mini mummy head to each bag.

Store in airtight container.

Monday, November 11, 2013

{Pumpkin Pie Place Cards}


Well, hey there! I haven't seen you in forever!

Really, I have no excuse for my lack of posting other than... life. You all know how that is, right? Life just gets in the way sometimes. Life moves FAST, doesn't it? Can you even believe that Thanksgiving in in just over 2 weeks? Crazy.

Today my friend Darla (of Bakingdom) is winging her way off to Spain. Spain?? What?

I'm over here all like, "Hey, I'm going to Target!". It's the glamorous life that I lead, folks. The worst part about it? My friend Lori and I are way excited about going to Target! We don't have one close, so we are road trippin' it (about 45 minutes) for a girls day out. Target and lunch with my awesome bestie friend? It may not be Spain, but it will be a great time.

Also, Darla doesn't have Target over there, so *sticks out tongue*

When she goes to London next month, I may NOT be able to contain my jealousy. It may end our friendship. I'll reconsider this if she buys me awesome presents though, so, Darla. Ball? Your court.

We will be getting some Christmas shopping done hopefully, and yes... Thankgiving foods will be purchased.

As I've mentioned in prior posts, I was a Blog Ambassador for Walkers Shortbread. My time is up with them, but I still choose to post about them because I love their all natural and delicious products. When I got the Shortbread Triangles out of the package, I loved their little pie shape. I decided to use it to it's full advantage and make them look even MORE like pies.

This was quick and easy and will be so festive on my Thanksgiving table.


All you need for these are the Walkers Shortbread Triangles, peanut butter candy melts (by Wilton) & white chocolate (candy melts or almond bark).

Melt some white chocolate (double boiler, microwave, or a chocolate pot like I have), and allow to cool slightly. Snip a tiny bit off the end of a ziploc baggie (heavier freezer bags work better) or a piping bag. Squeeze out in a circular motion working upward to make a little spiral of whipped cream. Allow this to harden.

Melt the peanut butter candy melts and spread on the top of the cookie and part way down the side. I use a baby spoon for a lot of my chocolate work. Work carefully and try not to get any on the 'crust' at the top and leave a bit for a bottom crust. Add one of the hardened "whipped creams" to the top while the peanut butter melts are still wet, then allow the coating to cool completely.

After that, simply make up little tags with everyone's names. Done!


Aren't they sweet?

And guess what?? They taste good too! Bonus!

You can also use Petticoat Tails (below), they don't turn out quite as clean, but they are still adorable!


I was cruising Pinterest this morning and stumbled across these cookies by Sweet Sugar Belle. I had actually not seen these before making my own (believe me, I thought I was SUPER clever coming up with the idea). I wanted to give a link though because I think Callye is amazing and because these are a great alternative to my placecards if you cannot find the Walkers products in your store or don't want to order online. Also, the fact that I had an idea similar to Callye is making me feel super clever anyway!


You can check out my other edible Thanksgiving placecards here.


I've got some other recipes in the works, so hopefully I won't go as long without a post again. Plus, I might just find something exciting on my trip to Spain. What? Oh, yeah. I mean on my trip to Target. Riiiiiiiiiight.

Til then,
Tina

(Who is, sadly, still in Ohio)


Pumpkin Pie Place Cards


Walkers Shortbread Triangles or Petticoat Tails
Peanut Butter Candy Melts
White Chocolate Candy Melts or Almond Bark
Paper
Printer or Pen
Scissors

Melt white chocolate (double boiler, microwave, or a chocolate pot like I have), and allow to cool slightly. Snip a tiny bit off the end of a ziploc baggie (heavier freezer bags work better) or a piping bag. Squeeze out in a circular motion working upward to make a little spiral of whipped cream. Allow this to harden.

Melt the peanut butter candy melts and spread on the top of the cookie and part way down the side. I use a baby spoon for a lot of my chocolate work. Work carefully and try not to get any on the 'crust' at the top and leave a bit for a bottom crust. Add one of the hardened "whipped creams" to the top while the peanut butter melts are still wet, then allow the coating to cool completely.

After that, simply make up little tags with everyone's names & cut out. Done!


Tuesday, October 8, 2013

{Easy Pumpkin Cupcakes with Brown Sugar Buttercream}


Ever had a dumb day?

You know, the 'why did I even bother getting out of bed?' type day.

Yeah, they happen. More often than we'd like. The other day I got a call that I'd been worried would happen for a couple years now. I've often mentioned that I am a youth leader at our church. We have been blessed with the coolest, hippest, all around awesomest youth pastor for the last 4 years. I've been working one-on-one with him for the last 3 of those. I knew he'd felt a call to go to California to plant a church. I knew it was going to happen for him one day. I'd just always hoped it would be later instead of sooner.

Well, it's sooner. It's now.

It was a dumb day.

While I'm very happy for him to be fulfilling his calling, I'm also breaking inside a little. I'm 11 years older than him, so he kinda feels like my little brother. I've definitely enjoyed getting to know him over the last 3 years. He's a great friend who I will miss tremendously. Then there's his wife. I love her too! She's incredible and amazing, and, well, we pretty much think alike. Although I've gone to church with her the entire time we were growing up, I'd never gotten to know her (because she was lots of years younger than me), until now. Man, I wish I'd known her all along!

Sure there's text, and facebook, and email, but... It's just not the same, is it?

Sunday was a huge cryfest in our teen room at church. He made the announcement which none of the kids were prepared for. He cried, I cried, all of the teens cried. Ugh. Did I mention he's the awesomest? Obviously, we all love him.

I came across a quote by Steven Chabosky from The Perks of Being a Wallflower that pretty much sums it up:

“Things change. And friends leave. Life doesn't stop for anybody.”

How true is that?

Julie (his wife) loves all things pumpkin, so I made these cupcakes with her in mind Sunday night.

Basically, I needed baking therapy (I baked 48 cupcakes that day- here's the other recipe), and I'm pretty sure we all needed cupcake therapy, so these were born.


I'm sure by now you have all seen the 2 ingredient pumpkin cake, right? It's literally a box of yellow cake & a can of pumpkin. That's what these are... kinda.

I started with a spice cake mix. When I added in the pumpkin, I could see it was still way too thick. So I added in a 1/4 cup water and a 1/4 cup oil. So many people have had success with just the cake mix and the pumpkin, but I did not. However... this worked great! While still a very thick batter, they tasted delish. They are kind of a mix between a cupcake and a very moist muffin.

I topped them with a Brown Sugar Buttercream, because why not?


I love the crunch the brown sugar gives the buttercream. It's a fun surprise in what looks like a perfectly creamy buttercream. It's pretty yumtastic too!

Cupcake. Therapy. It's a good thing.

To Robby, Julie, and the awesome Sir William (what I call their most adorable 4 year old), we will miss you. So much. We all wish you the best. We know you'll change lives in California, just like you changed lives here in Ohio. Thank you for all the time you've invested in us here.

Much love and best wishes.


And I know you'll be back to visit.

Because cupcakes.

Oh, and you have family here, but whatever. Cupcakes.

Tina


Pumpkin Cupcakes with Brown Sugar Buttercream
yield: 24 cupcakes

For the cupcakes:
1 box Spice Cake Mix (I used Duncan Hines brand)
15 ounce can of Pumpkin
1/4 cup oil*
1/4 cup water*

*if needed

Heat oven to 350 F

Mix together cake mix and pumpkin with a mixer. Add oil and water if necessary. Scoop into cupcake liners (batter will be thick). Bake 22-25 minutes until toothpick comes out clean.

Brown Sugar Buttercream:
1 cup (2 sticks) unsalted butter, at room temperature
1 lb. (about 4 cups) confectioners’ sugar
1/4 cup packed brown sugar
1/4 teaspoon salt
2 to 3 tablespoons heavy cream
2 teaspoons vanilla extract

With mixer, beat butter for 3 minutes. Beat in brown sugar. Slowly add powdered sugar and salt until well combined. Add 2 tablespoons heavy cream. Beat on high for 4 minutes. If too thick, add more cream 1/2 teaspoon at a time until desired consistency.


Buttercream adapted from Bakingdom


Friday, October 4, 2013

{Pumpkindoodle Cookies}


My dog is adorable. She really is.


She's also dumb. I'm sorry, you people are getting your feathers all ruffled because I'm saying my pet is dumb. Please believe me when I tell you, SHE IS DUMB.

I love her, but... dumb.

You know that test where you throw the blanket over your dog and the quicker they get out from under it, the smarter they are? She just stands there. Endlessly. Stands. Until we take the blanket off.

She is afraid. Of EVERYTHING. A rustling bag, a piece of paper, leaves falling from the sky. Everything is terrifying. We live in the country and are surrounded by woods. There are very often hunters. Gun fire is THE MOST TERRIFYING thing ever. Well, that and fireworks. She has actual little doggy panic attacks.

Then, there is the screen. If the screen gets pulled and then the sliding door, well, she's gonna run into it. Not once. Not every once in a while. Every. Time.  We try to tell her to wait. She does not listen.

Bam! Luna, full force, into the screen. We try very hard not to pull the screen for this reason, but sometimes.. it happens. Luna face smash follows. Every. Time.

This story is pretty funny, right? Allow me to entertain you with the fact that my 16 year old, highly intelligent Honor Student has done the exact same thing. Open the sliding door, walk straight into the screen. He's done it with a glass door out in public once too.

I'm sorry, but funniest thing ever in ever.

Maybe I'm a bad doggie parent. Maybe I'm a bad parent. Funny.

You know what else is funny? The name of these cookies. You know what's NOT funny? The taste...
Cause yum.


Snickerdoodles are my favorite cookie. I love them so much, that I only make them once or twice a year. The other day I was thinking about how soft and lovely Snickerdoodles were, when I came up with the idea to add pumpkin and fall spices. I wasn't even sure if it would work, but ya know what?

DID. They are pretty perfectly fall too. I love the tiny taste of pumpkin combined with the cinnamon, nutmeg, and ginger.


Bean loves them. My husband, who doesn't like Snickerdoodles (seriously, he even made up a 'recipe' for his own, which you can see here) OR pumpkin loves them.

One of my youth groupers, (I took cookies to church), even said that this was the perfect companion to a Pumpkin Spice Latte. Really now, who can say no to that??


This recipe, much like my dumb dog, and my... door challenged son, is a keeper.

Tina


Pumpkindoodle Cookies
by Tina @ Sugar Bean Bakers
yield: 4 dozen 2 1/2" cookies

1/2 cup butter, softened
1/2 cup shortening (I prefer Crisco)
1 cup sugar
1/2 cup brown sugar
1 egg
3/4 cup pumpkin 
1 teaspoon vanilla
3 1/2 cups flour
2 teaspoons cream of tartar
1 teaspoon soda
1/4 teaspoon salt
1/2 teaspoon cinnamon
1/4 teaspoon nutmeg

Coating:

3 tablespoons sugar
1 teaspoon cinnamon
1/4 teaspoon ginger

Preheat oven to 400 F

Line a baking sheet with parchment paper (or use an ungreased sheet).

Cream together butter and shortening. Beat in sugars until fluffy. Add egg, vanilla, and pumpkin.
Mix in cream of tartar, soda, salt, cinnamon, and nutmeg. Slowly beat in flour.

In a small bowl, stir the 3 tablespoons sugar, teaspoon cinnamon, and 1/4 teaspoon ginger together.

Shape dough into 1 tablespoon sized balls, then roll into the coating mix. 

Place on baking sheet, and lightly flatten with the bottom of a cup. (Don't press down too hard, just enough to get the ball shape down a little.)

Bake at 400 for 8-10 minutes. Remove to wire racks to cool.


Thursday, September 19, 2013

{Caramel Apple Cake}


I think you all should know that today is Hermione Jean Granger's birthday, BUT, I promised not to talk about Harry Potter for a while, so, I did NOT just tell you that. (However, I WILL tell you that Darla has some aweeeeeesome cuppies made for our favorite smartypant's birthday. Oh, and there are also these that I made for her a while back!).

Anyway...

I've been following the production of what promises to be an amazing movie (no, not the new Potter universe film). The movie is called The Fault in Our Stars and is based on the best selling book of the same title by John Green. If you didn't already know, I'm a Nerdfighter and rabid fan of John Green. For reference, or to figure out what the heck a Nerdfighter is, see my post here.

Finally watching one of John's movies head to the screen (Looking for Alaska, An Abundance of Katherines, and Paper Towns were all optioned by movie companies, but never made) is pretty exciting. John has been on set and keeps posting videos and photos. It's all so much fun to see come to life.

The Fault in Our Stars has been by far John's most successful book (although they have all been on the best sellers list. In fact, early this year, they were all on the best seller list at the same time). Many celebs have read TFiOS, it's been in magazines, and John's even been on the Late, Late Show with Craig Ferguson.

So, it's pretty popular. It's also going to be an AMAZING movie and I can't wait. I wasn't too excited about the actress cast as Hazel Grace, but, meh, I'm giving her a chance. She WAS nominated for a Golden Globe, so I guess the bad acting on the "teen" show was due to poor writing!

I'm totally over here in my corner having a hipster moment. You know, I liked John Green before it was cool, I read TFiOS before it was the big time. Yeah, I'm cool like that.

I'M SO EXCITED!!!!!!!!! (I know, I know, I just lost my cool points yelling like a fool).

What does this have to do with the cake I made?

Exactly....nothing.

However, read the book. You'll need cake after. I promise.


This cake is a wonderful fall recipe. It's sweet but spicy, moist and covered in a delicious streusel. It's great for dessert or for breakfast. 

  Drizzle with a bit of caramel topping to make it even more delicious.

Then... eat up! 

 Hello, my lovely Fall treat. I've missed you and your friends so.


Le yum.

And as they say in my hometown, don't forget to be awesome,
Tina

If you haven’t already,  you can ‘like’ my Facebook page here, and follow me on twitter here, and you can follow me on instagram here.


Caramel Apple Cake 
recipe by Tina @ Sugar Bean Bakers

Cake:

1 cup flour
1/4 cup melted butter
1/2 cup brown sugar, packed
1 egg
2 medium apples, peeled, cored, and diced
1/4 teaspoon salt
1 teaspoon cinnamon
1/2 teaspoon vanilla
1/2 teaspoon baking soda
1/2 teaspoon baking powder
1/2 cup caramel ice cream topping

Topping:

1/4 cup butter, cold
1/3 cup brown sugar
1/3 cup flour
1/3 cup quick cooking oats
1/2 teaspoon cinnamon


Preheat oven to 350 degrees F
Grease a 9x9 baking pan and set aside

For Cake:
Beat together melted butter, egg, and brown sugar until fluffy. Add in caramel topping. After incorporated mix in dry ingredients. Finally, fold in apples. Pour into prepared pan.

For Topping:
In a mixing bowl, cut the cold butter into the dry ingredients until it resembles peas. Sprinkle over prepared cake.

Bake for 35 minutes or until toothpick inserted in center comes out clean.

Allow to cool, drizzle with caramel ice cream topping, if desired.


Friday, September 13, 2013

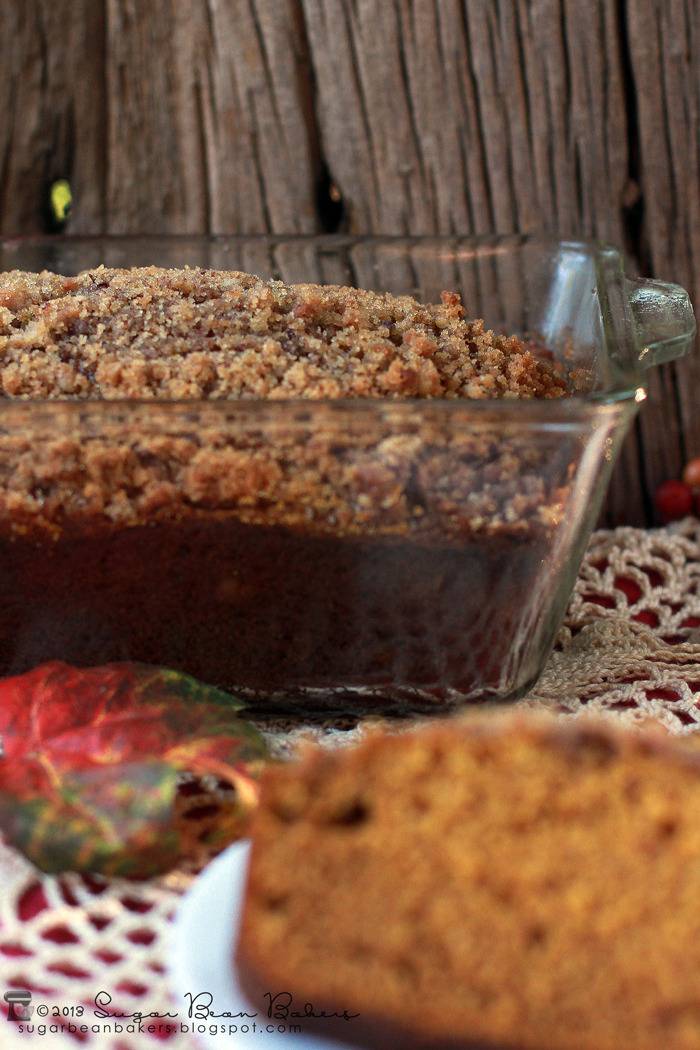
{Cinnamon Streusel Topped Pumpkin Bread}


I'd apologize for what I'm about to talk about, but I'm not sorry, so... No.

DID YOU HEAR??????????? THERE ARE GOING TO BE NEW HARRY POTTER UNIVERSE MOVIES! GAH. SIRIUSLY. I. CAN'T. EVEN.

Practically the second it was announced, my niece posted on my timeline and asked if it was true. So, OK. I love two things about this. 1. that I've made excellent nerd minions in my nieces and child and 2. I'm like the leading authority on all things nerddom to them.


I immediately started iMessaging Darla. She wasn't responding. I was losing my mind. FINALLY she responded (her iPad wasn't making alert noises! Dumb Apple, this is ALL CAPS IMPORTANT).


Yes, her iPad's name is the Marauder's Map. Mine is the Monster Book of Monsters. What?!


Any Potter fan will know that there have been rumors, "official" news, leaks, etc all saying there would be new Potter books, etc... never true. We've gotten our hopes up only to have them dashed far too many times. This, is ALL TRUE. A series of movies (with all the screenplays being penned by good ole JK Rowling herself) starring the character Newt Scamander will be an expansion of the Wizarding World. Not techinally Harry Potter movies at all... guess what? No one cares! Wizards, witches, magic, adventure, Fantastic Beasts... and where to find them! YESSSSSSSSS.

So, we continued to freak out. Then Darla said that she was weakened by the excitement and needed a snack. I thought that was an excellent idea.


This is her snack. She posted the photo on her instagram.


My snack? Well, it was also tea. And bread. Pumpkin bread. This bread in fact, but wait.. there's MORE.

Then SHE messaged ME with news


We are going to Orlando next September. We'll be doing Disney and, of course, Potter World (The Wizarding World of Harry Potter and Universal Studios). There was always speculation that the new London part of WWoHP would be done in the summer. We were PRETTY SURE that we would be in the clear and able to see it, but honestly, NOT being there in time was a huge fear. Especially for Darla who is flying back from The Netherlands to go! So, confirmation that it will open Spring 2014 when we aren't going until Fall 2014? AWE-to the-SOME.

So, anyway, back to the bread... (Finally, right? Whatever.. POTTER!!!!!!!!).


What better thing to make for Potter than pumpkin....

This gorgeous, glorious, fall scented, flavor packed bread is a creation of none other than the crazed Potter fan above, Darla.

Just look at that wonderful streusel!


Yuuuuuuuuuuuuum.

This is a quick and easy recipe. It's also quite large. It makes 3 full sized loaves.

You'll want to give two away. Otherwise you'll eat it. ALL. It's that good.


Mine are definitely finding new homes today. I really want to still fit into the seat on the Forbidden Journey next year at Potter World!

So, um.. I promise not to talk about Harry Potter for a while. It'll be a struggle for me, but I know I've had an influx of Potter posts lately (sorry, not sorry).

Well.... it most likely won't be about Potter anyway ;)

Until then...

Tina (a very, very happy Potter fan)


P.S. (See all my Potter posts here)
P.P.S. If you haven’t already,  you can ‘like’ my Facebook page here, and follow me on twitter here, and you can follow me on instagram here.


Recipe:

The only variations I made were:
I didn't use the pepitas & I sprinkled the loaves with a bit of brown sugar fresh from the oven. This gave them a most excellent crunch when cooled.

LinkWithin

Related Posts Plugin for WordPress, Blogger...